How to Generate Parcelhub Labels from Within One Stop Order Processing
The following guide contains an overview of using ParcelHub with One Stop Order Processing, including how to generate labels and add services.
This feature is available in the Professional, Premium and Managed subscriptions of One Stop Order Processing.
Test Mode
When testing and experimenting with generating courier labels it may be beneficial to use Test Mode. Test Mode allows you to trial different options without buying courier labels or entering your courier account credentials. You will be unable to send parcels until you are using live mode not test mode.
You can use Test Mode by going Couriers -> Setup Couriers -> Courier Setup -> Parcelhub ->Test Mode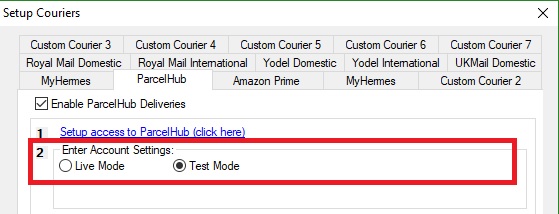
Setting up Parcelhub in One Stop Order Processing-
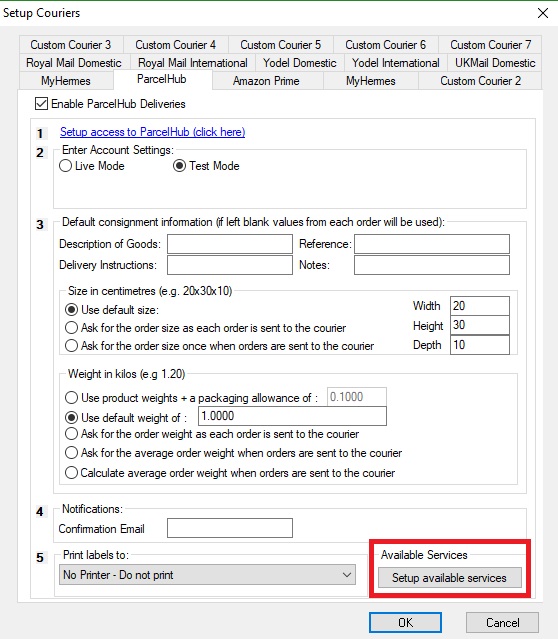
Step 1 :Entering your Parcel Hub credentials
When setting up couriers in One Stop Order Processing, each courier has a different tab making it clear and easy to change different settings and options dependant on your courier. You can find your Parcelhub tab by following the instructions below.
Couriers-> Setup Couriers -> Courier Setup -> Select the Parcelhub tab.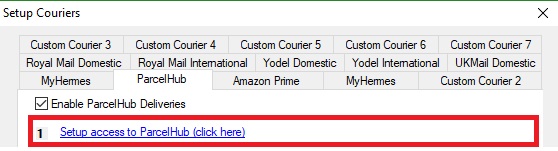
Step 2 :Creating a Parcel Hub account - To successful use Parcelhub with One Stop Order Processing you will need a Parcel hub account. You can request an account or set up a current account by clicking the link below.
https://www.parcelhub.co.uk/business-enquiry/
Alternative you can click the link in section 1 of the One Stop Order Processing Parcelhub tab.
Step 3 :Entering your default consignment information -
In section 3 of the Parcelhub tab you are able to include your default information, such as the default weight and size of your package and shipping information such as delivery instructions and description of the goods. If your parcels vary in weight and size you can use our other options such as Calculate average order weight when orders are sent to the courier or you can input the different weight and size of the order each time using out Ask for the order size/weight as each order is sent to the courier.
Please Note If you choose to leave this section blank then values from each order will be used.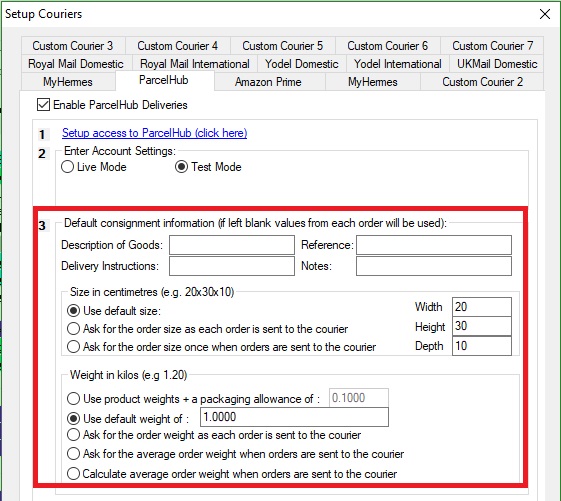
Step 4: Notifications-
If section 4 you can input an email address that can have any order confirmation sent to.

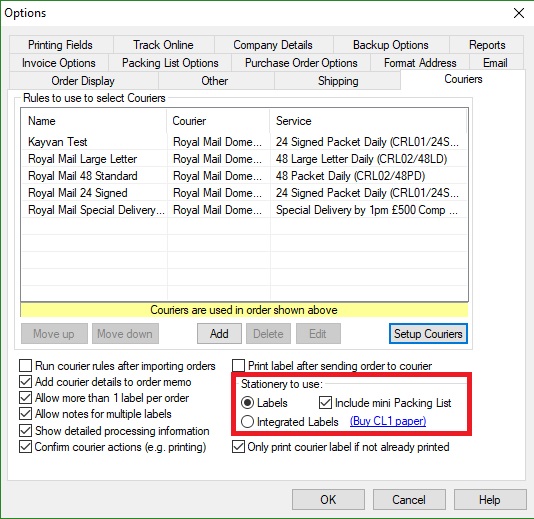
Step 5: Printing
Section 5 allows you to select your printer, this is handy if you have a different printer per courier. For example, you could have a dedicated printer for Parcel hub labels that fit 6x4" integrated label paper.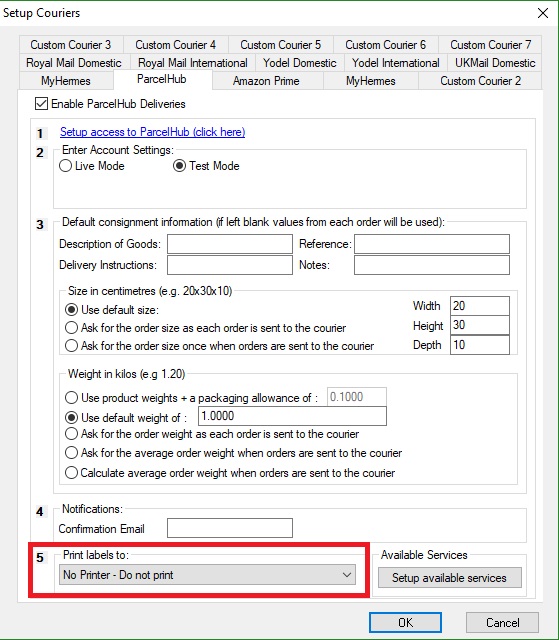
Please Note You can buy 6 x4" integrated label paper from One Stop Order Processing by clicking the following link.
http://www.1stoporders.com/Integrated-Label-Invoice-Paper-for-One-Stop-Order-Processing.html
Alternatively, you can follow the link in One Stop Order Processing by going-
Courier -> Courier Setup -> Setup Courier -> and Clicking (Buy CL1 paper) under the Stationery to use header.
Step 6: Setting up Parcelhub Services-
Next to your printer selection, you can add available services to selected services depending on your needs, you can do this by selecting the available services on the left hand side and using the Add> button to move them to the Selected services side where they will then be available to use. If you would like to remove a service from your selected services you can use the <Remove button to place them back into the Available services list.
�
Please Note - Through Parcelhub you can print with a variety of different couriers include Yodel, Hermes, DPD, UK Mail, DHL, Whistl, UPS, DX, Parcelforce, CollectPlus, SkyNet, ArrowXL, Interpost, Panther Logistics, Direct Link and Palletforce
|
|
Related Articles
How to Generate Yodel Labels within One Stop Order Processing
The following guide contains an overview of using Yodel with One Stop Order Processing, including how to generate labels and add services. This feature is available in the professional, Premium and Managed subscriptions of One Stop Order Processing ...How to Generate MyHermes Labels from Within One Stop Order Processing
The following guide contains an overview of using MyHermes with One Stop Order Processing, including how to generate labels and add services. This feature is available in the Professional, Premium and Managed subscriptions of One Stop Order ...How to Generate Uk Mail Labels from Within One Stop Order Processing
1. Setup the account with NetDespatch. A link is provided to create your account details. Create a UKMail account with Netdespatch, this can be done by opening a ticket here. NOTE: NetDespatch do not charge you for using their services and your ...Automatically Create Courier labels from Royal Mail Click and Drop within One Stop Order Processing
This guide shows you how to move your Netdespatch integration to work with Click and Drop. In addition, it also shows you how to create a new connection between OSOP and click and drop. To complete the setup you will need to have an account with ...How to create test Yodel courier labels from within One Stop Order Processing
This feature is available in the Professional, Premium and Enterprise subscriptions of One Stop Order Processing. You can use the Netdespatch integration in test mode, this will allow you to create test labels for Uk Mail royal mail and Yodel. How ...