Automatically Create Courier labels from Royal Mail Click and Drop within One Stop Order Processing
This guide shows you how to move your Netdespatch integration to work with Click and Drop.
In addition, it also shows you how to create a new connection between OSOP and click and drop.
To complete the setup you will need to have an account with Royal Mail click and Drop, Click here to apply. It can take up to 48 hours to link your Royal Mail OBA account with your new click and drop account.
Downloading Click and Drop desktop
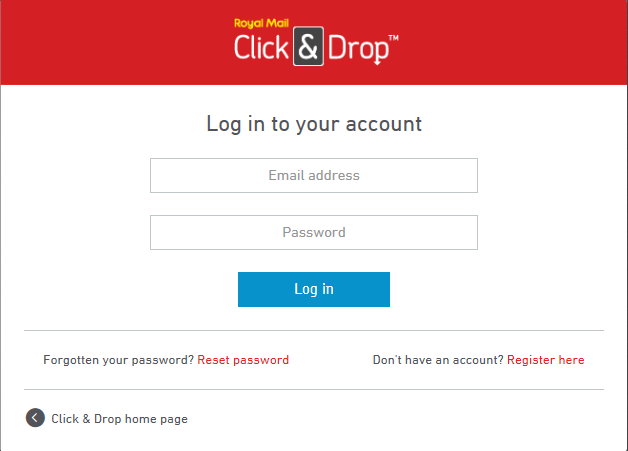
1. Login to your Click and Drop online account
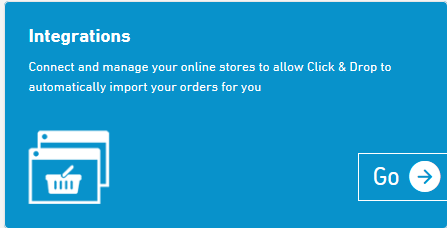
2. Follow the menu option, Settings -> Integrations

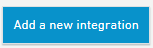
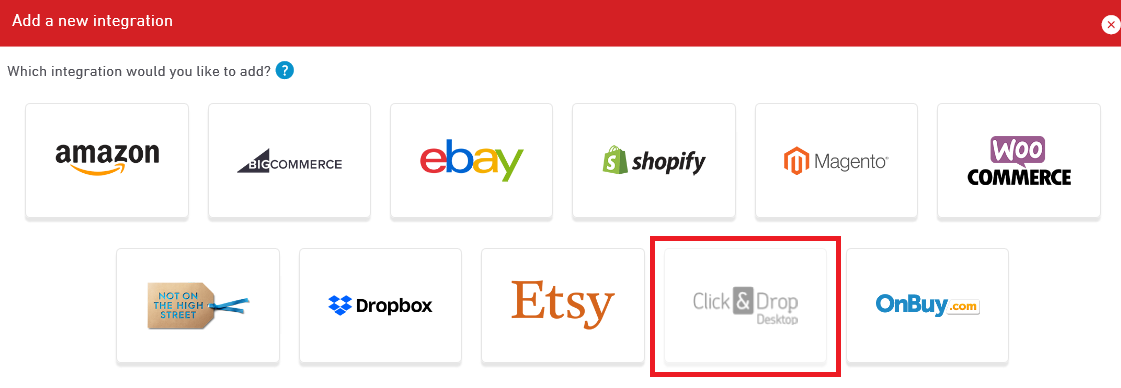
3. Click "Add a new integration
4. Click and Drop Desktop
5. Download Click and Drop Desktop
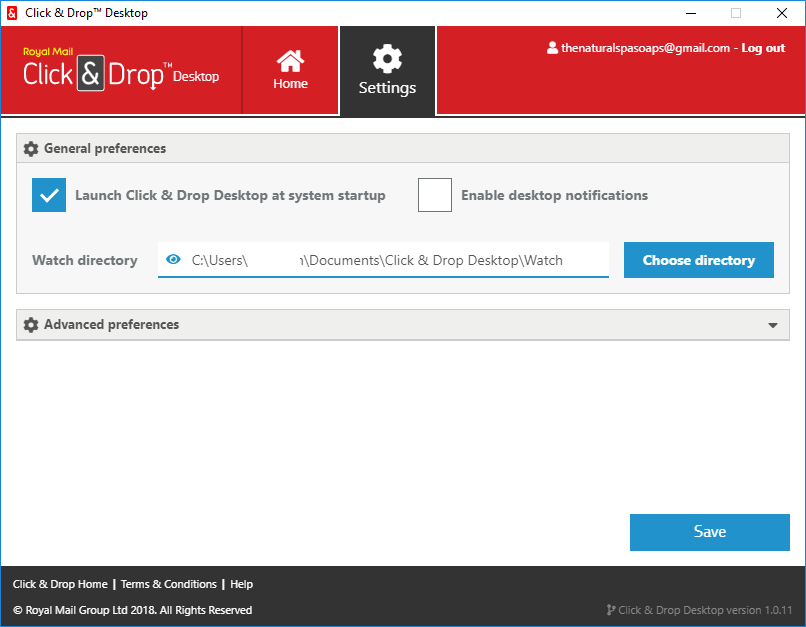
6. Open Click and Drop Desktop
![]()
7. Click Settings
8. Untick Enable Desktop Notifications
9. Go back to Click and Drop Online
10. Settings -> Integrations -> Click and Drop Desktop
11. Tick "Save labels to my computer "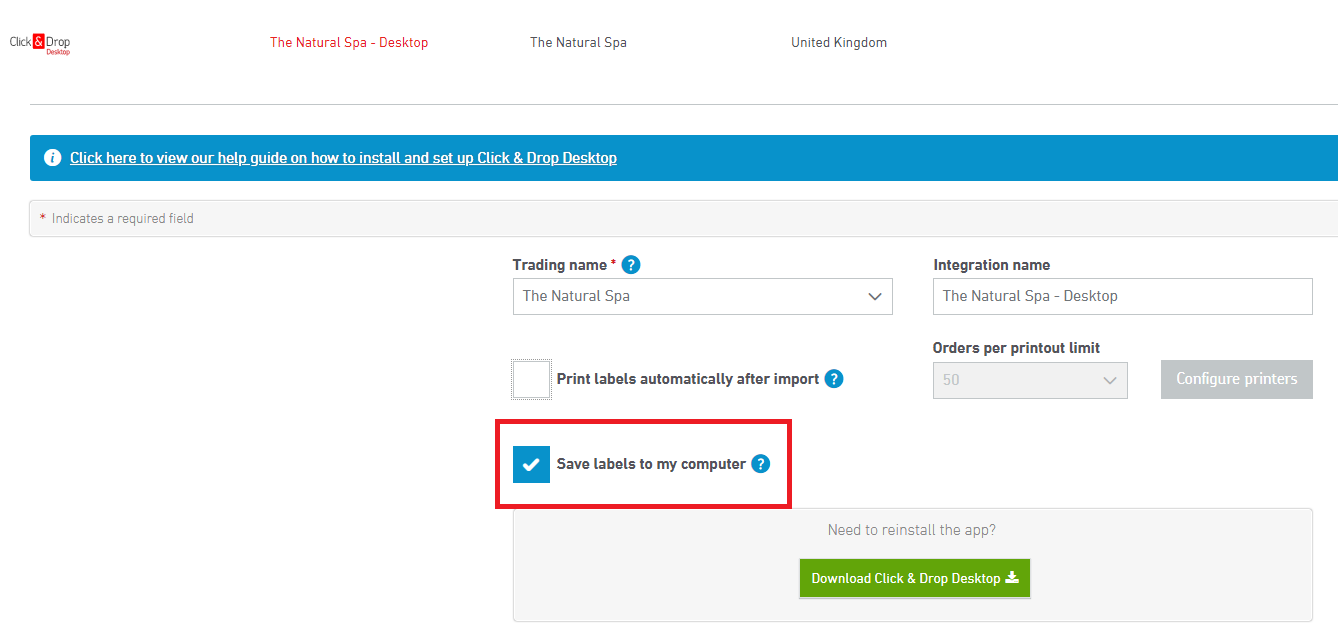
13. Click Save
14.Click Update
Setup One Stop Order Processing
Configure Click and Drop Settings within One Stop Order Processing
1. Follow the menu option Courier -> Courier setup -> Setup Couriers
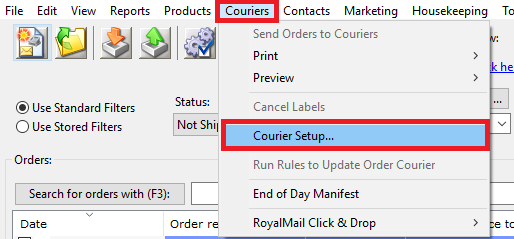
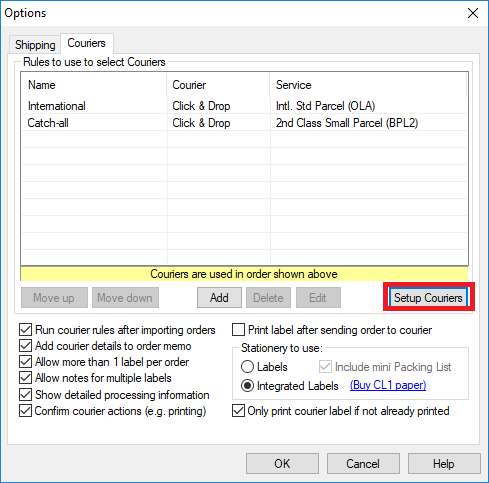
2. There is now a click and drop tab, click this

3. Tick "Enable click and Drop"
4. The folder location should default to something like "C:\Users\1stoporders\Documents\Click & Drop Desktop\Watch . If it is showing different delete the information, click ok and reopen.
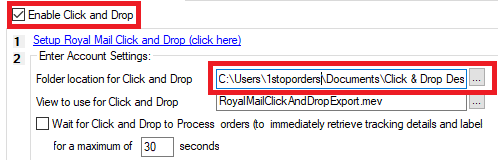
5. Tick Wait for Click and Drop to process orders ... this will automatically pull your tracking numbers back into the software.
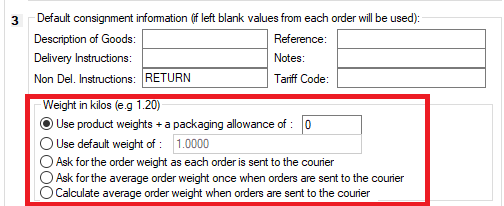
6. Choose how Click and Drop picks up your weight
7. Click "Setup available services"

8. Move any services that you use into the Selected Services column.
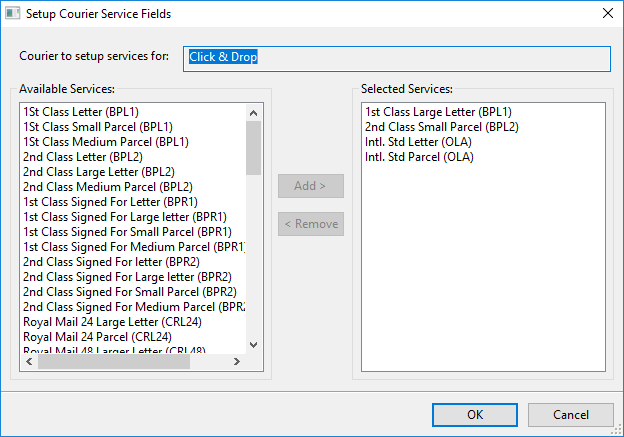
9. Click Ok to save your changes
Creating or adjusting your courier rules to assign your services in One Stop Order Processing:
One Stop Order Processing can choose the services for you based on set rules. Alternatively, you can set couriers and services manually as you process orders.
If you have not set up rules yet click here to watch a video showing you how to do this. If you already have rules setup follow the steps below to move these over to click and drop.
1. If you have courier rules adjust these to assign the click and drop services.
� � � � � � �Courier -> Courier Setup -> Double click the rule -> Choose the courier Click and Drop -> Choose the relevant click and drop service
Linking One Stop Order Processing to Click and Drop.
Note: This should only need to be done once
1. Tick a sample order that has the service assigned.
![]()
2. Click Send to courier
![]()
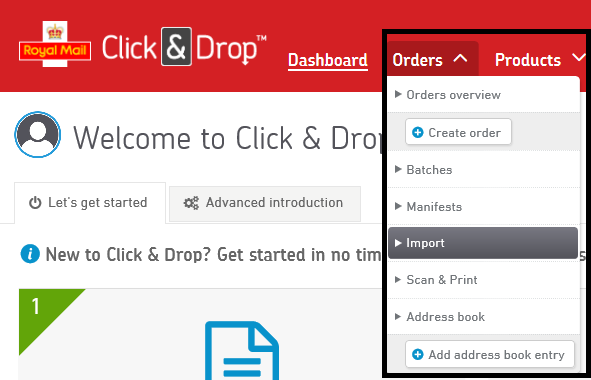
3. Go to Click and Drop Online

4. Follow the menu option Orders -> Import
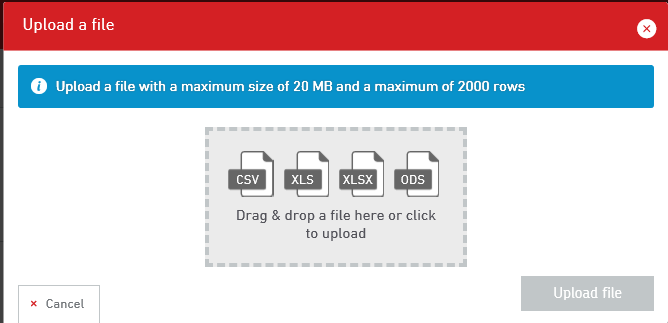
5. Attach your file, this will be saved in your watch directory, by default, this will be\Documents\Click & Drop Desktop\Watch
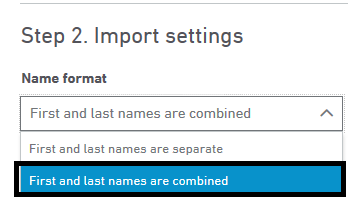
6. Choose first and last names are combined from the drop down bar
7. Map your headers to the equivalent header in Click and Drop.

8. Click Import
9. Now you need to delete this order.
Generating your first labels
1. Tick your orders ( making sure your new courier rules have been run or you have manually applied the courier and service code)
![]()
2. Click "Send to courier"
![]()
Please note: All tracking numbers produced will be automatically pulled back into One Stop Order Processing. Then when you mark your orders as shipped this will be passed back to your selling platforms.
Related Articles
How to Change the Courier sent to Websites (e.g. change Click and Drop to Royal Mail)
When you send tracking details to Amazon or Ebay you sometimes need to change the courier details setup in OSOP to what is expected by the website (e.g. Amazon). For example, Click and Drop should be sent as Royal Mail. The following article explains ...Royal Mail have told me our customs data is not compliant
The default Click and Drop views contain basic information that should allow your orders to be compliant with the new digital customs information. However, if you have issues the following guide explains how to resolve them. Country of Origin is not ...How to update Click and Drop to support the Windsor Framework for Northern Ireland
When orders are sent to Royal Mail Click and Drop you need to add the Recipient Is A Business field to each order. More details on this at the Royal Mail website at: ...How to create Royal Mail, DPD and Amazon Logistics shipping labels for your Amazon Orders from One Stop Order Processing
How to create Royal Mail, DPD and Amazon Logistics shipping labels for your Amazon Orders from One Stop Order Processing How to create Royal Mail, DPD and Amazon Logistics shipping labels for your Amazon Orders from One Stop Order Processing This ...How to create Royal Mail, DPD and Amazon Logistics shipping labels for your Amazon Orders from One Stop Order Processing
How to create Royal Mail, DPD and Amazon Logistics shipping labels for your Amazon Orders from One Stop Order Processing This feature is available in Professional, Premium and Managed versions of One Stop Order Processing One Stop Order Processing ...